This is a “How to” post on hosting Webex Teams bots.
In our team, we are developing variety of bots for different functions/departments. The easiest way for our “customers” to host those bots, is to use our teams servers. However, it becomes complicate to manages all those bots on the same server, with different dependencies and packages (also we are guilty of not using virtual env properly).
So, we’ve decided to try out Docker for hosting bots, with the further idea to transfer them to other servers.
In this post we will explore a procedure and caveats for a simple echo bot, just to show the methodology.
Let’s get started then.
Environment
We are using a AWS EC2 AMI Linux instance (t2.small).
The Docker was installed according to this doc Docker Basics for Amazon ECS.
The bot’s identity was created from Webex Teams Developer Portal. A very detailed step-by-stem on how to create it could be found at Automating Webex Teams (Python) tutorial.
Docker configuration
After reading this helpful post about Building Minimal Docker Containers for Python Applications we’ve decided to use alpine image.
Create an empty directory where files for the container will be located:
mkdir webex-bot
cd webex-bot
For our simple bot to function we need just to non-standard packages, that are defined in requirements.txt:
Flask>=1.0.2
requests>=2.18.4
The Docker file is pretty simple as well:
FROM python:3.6-alpine
COPY . /app
WORKDIR /app
RUN pip install -r requirements.txt
In order to build the image:
sudo docker build -t "dmkravch:Dockerfile" .
And to start the container:
sudo docker run -i --net=host -p 8090:8090 -t dmkravch:Dockerfile /bin/sh
Note1: alpine supports only /bin/sh shell. Note2: we are using port 8090 on both, host and container, to receive connections. Note3: Important key –net=host enables the Docker to use the host’s network stack for the container.
In the same directory we are storing the actual file for the bot, echo.py:
import json, requests
from flask import Flask, request

app = Flask(__name__)


# functions:

def post_request(url, dane, headers):
    created = requests.post(url, data=dane, headers=headers)
    x = created.content.decode("utf-8")
    x = json.loads(x)
    id = (x["id"])
    return id


def create_message(roomId, message):
    messageUrl = "https://api.ciscospark.com/v1/messages"
    dane = {
        "roomId": roomId,
        "text": message
    }
    dane = json.dumps(dane)
    messageId = post_request(messageUrl, dane, headers)
    return messageId


def get_message(msgid, accesstoken):
    url = "https://api.ciscospark.com/v1/messages/" + msgid
    headers = {
        'Authorization': accesstoken
    }
    obtained = requests.get(url, headers=headers)
    # print(obtained)
    dict = json.loads(obtained.text)
    dict['statuscode'] = str(obtained.status_code)
    return dict


# ------------------------------------------------------------
at = "BOT ACCESS TOKEN from developer.webex.com"
accesstoken = "Bearer " + at
webhook_id = "WEBHOOK ID created on developer.webex.com"

# This is the ID, that you can see for example in message as creator. It is not the same as botID, that you can see when creating bot:
bot_id = "BOT ID to avoid looping of messages"

headers = {
    'Authorization': accesstoken,
    'Content-Type': "application/json; charset=utf-8",
    'Cache-Control': "no-cache"
}


# ------------------------------------------------------------

@app.route("/", methods=['POST'])
def handle_message():
    data = request.get_json()
    personid = data["data"]["personId"]

    if personid == bot_id:
        return 'ok'
    else:
        if data["id"] != webhook_id:
            return 'ok'
        else:
            msgid = data["data"]["id"]
            roomId = data["data"]["roomId"]
            txt = get_message(msgid, accesstoken)
            create_message(roomId, txt['text'])

            return "ok"

app.run(host='IP or DNS NAME OF THE EC2 INSTANCE',port=8090)
Webex Teams bot configuration
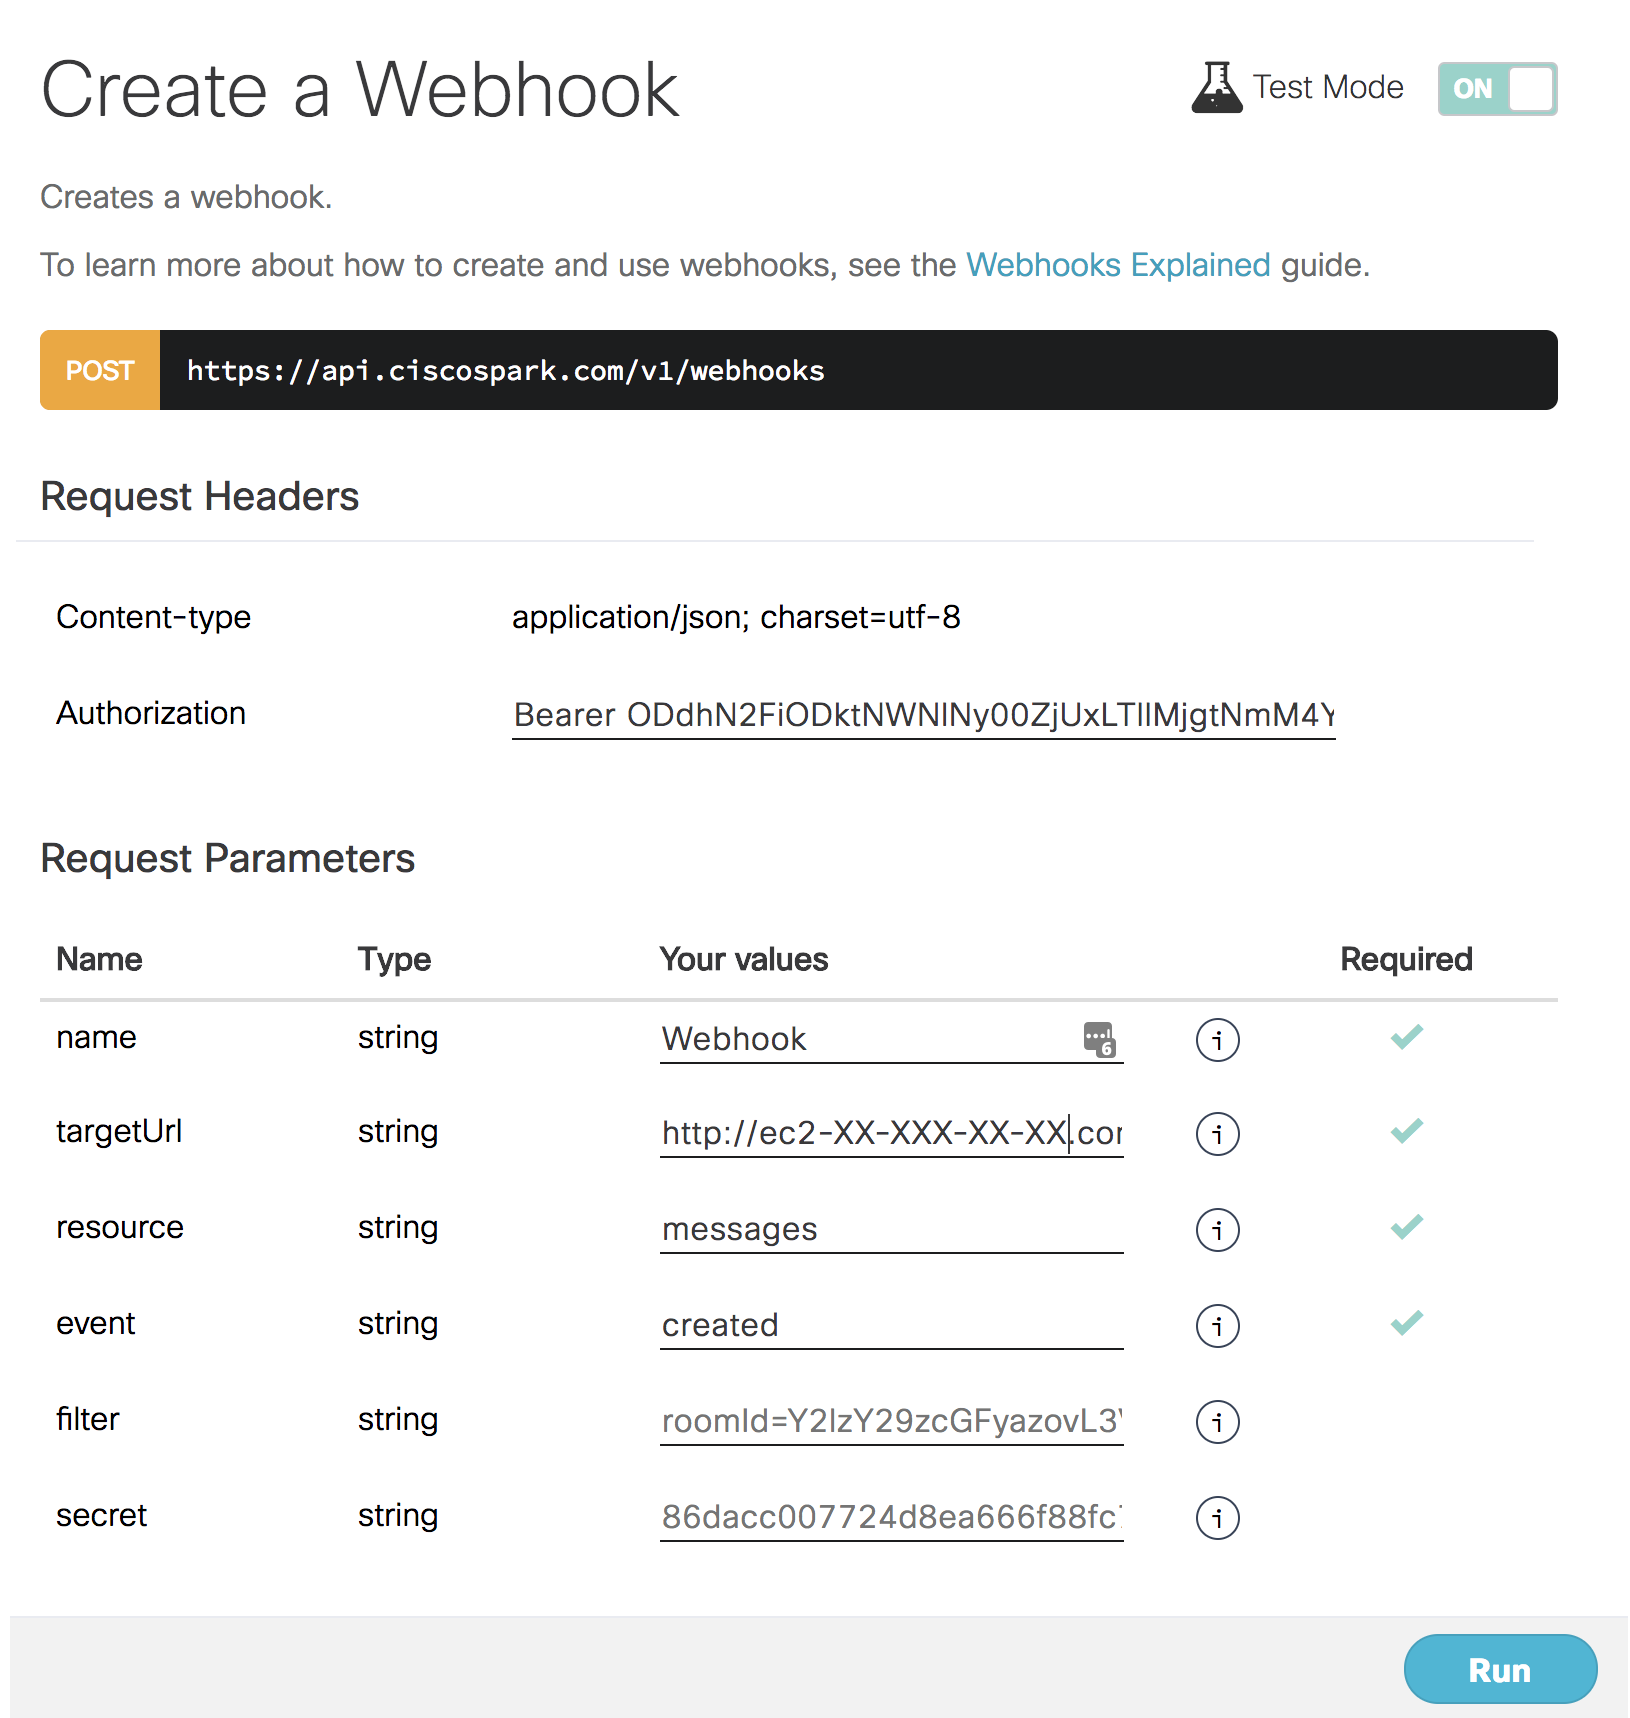
Very important to create a webex teams webhook to that EC2 instance and specify the correct port, in our case it’s http/8090. If you want to use https, please, take care of the certificates, which are describe in the Running Your Flask Application Over HTTPS blog post.
An example of how to create a webhook pointed to the EC2 instance:
Running the both
As you remember, we’ve started a Docker container with:
sudo docker run -i --net=host -p 8090:8090 -t dmkravch:Dockerfile /bin/sh
which will automatically put us inside of the Docker container. From there we could simply issue a command to run the bot, which will start listening on the port 8090:
python echo.py
WARNING: Published ports are discarded when using host network mode
/app # python echo.py
 * Serving Flask app "echo" (lazy loading)
 * Environment: production
   WARNING: Do not use the development server in a production environment.
   Use a production WSGI server instead.
 * Debug mode: off
 * Running on http://XXX.XX.XX.XXX:8090/ (Press CTRL+C to quit)
And when a new request from the bot is received, it should be shown in the console:
...
...
 * Running on http://XXX.XX.XX.XXX:8090/ (Press CTRL+C to quit)
18.221.216.175 - - [09/Jun/2018 13:38:43] "POST / HTTP/1.1" 200 -
That’s it! Now you could transfer that container to any server (given that the webhook destination is changed) and start the bot.
Troubleshooting
Here you could find some useful commands to troubleshoot, in case something goes wrong.
To check available images:
sudo docker images
REPOSITORY          TAG                 IMAGE ID            CREATED             SIZE
dmkravch            Dockerfile          f2dc6382956f        19 hours ago        104MB
To check if the needed port is opened:
sudo netstat -tulpn
tcp        0      0 XXX.XX.XX.XXX:8090          0.0.0.0:*                   LISTEN      20613/python
To check running containers:
sudo docker ps
CONTAINER ID        IMAGE                 COMMAND             CREATED             STATUS              PORTS               NAMES
51e84984a404        dmkravch:Dockerfile   "/bin/sh"           8 minutes ago       Up 8 minutes                            angry_tesla
If you want to check if the container and flask could reply, use the curl command:
curl http://XXX.XX.XX.XXX:8090/
<!DOCTYPE HTML PUBLIC "-//W3C//DTD HTML 3.2 Final//EN">
<title>405 Method Not Allowed</title>
<h1>Method Not Allowed</h1>
<p>The method is not allowed for the requested URL.</p>
In the case above, the error is obvious, as the method GET is not allowed, only POST.
That’s a simple “proof-of-concept” example, which could be further enhanced and scripted.
I hope it will be useful for someone and could save some time.
Thank you.
